Pages

Thursday, May 31, 2012

Just Thinking of You Card


Have you ever found yourself in the middle of your card project and wish you had a different stamp, or different colour stamp pad?  Well, that's what happened to me today.  Luckily my creativity kicked in and I solved the problem with what I had on hand.  However, a few things were added to my stash "want" list!  This Just Thinking of You Card was made for the Freshly Made Sketches challenge.  The Summer Smooches designer series paper by Stampin' Up! makes this sketch come alive with colour. 

Just Thinking of You Card Supplies:  White cardstock, lucky limeade and razzleberry cardstock by Stampin' Up!, Summer Smooches designer series patterned paper by Stampin' Up!, Fiskars scallop edge punch, Cricut Machine for ovals (George and Basic Shapes cartridge), lucky limeade and razzleberry stampin' pads, rubber stamp by Hampton Art, Boho Blossoms punch by Stampin' Up!, Language of Friendship stamp set by Stampin' Up!, stampin' dimensionals, and rhinestones. 

rita blog hop badge

Wednesday, May 30, 2012

Contemporary Card

For this weeks ColourQ challenge I wanted to do something different.  Over the last couple of days I've been experimenting with my artistic abilities.  I have a painting that I made in college that inspired this card.  I would sum up this contemporary card by saying it is clean, simple, modern, and fun.   


Contemporary Card Directions:
  1. Make card from white cardstock.  Finished size: 4" x 5.5".
  2. Trim blue cardstock slightly smaller than card, wrap and secure twine, and adhere.
  3. Punch 1 1/2", 1", and 3/4" circles, layer circles, adhere middle circle with dimensionals and outer circles directly to card.
  4. Stamp sentiment and adhere rhinestones.
My artwork from college.

Tuesday, May 29, 2012

Abstract Card

Growing up I loved to make collages out of construction paper and pictures from magazines.  I used to save all the wrapping paper from my Christmas and birthday presents to make collages.  It was cheap entertainment for a country girl.  This love of paper evolved through the years.  In college I took several art classes and that's where I realized my love for abstract art.  One thing I love about abstract art is there are no rules, anything goes.  This abstract card was a lot of fun to make.  So, get the scissors and adhesive out and go abstract!    

Abstract Card Directions:
  1. Make card from cardstock, or use ready made card.  Finished size: 4.75" x 6.5".
  2. Trim white cardstock slightly smaller than card.
  3. Cut desired shapes and adhere to white cardstock.
  4. Stamp sentiment, punch holes, attach and wrap twine around cardstock, adhere brads, and use dimensionals.
  5. Adhere abstract image to card. 

Monday, May 28, 2012

Get Well Card

When it comes to colours, I love purples, greens, and aqua.  The Basic Grey paper I used in this weeks Paper Players Challenge is one of my favorites.  My opinion of Get Well Cards is they should be pretty and cheerful.  Hopefully when my neighbor receives this card it will put a smile on her face.

Get Well Card Supplies:  Cream cardstock, patterned paper by Basic Grey (Sweet Threads Collection, a-line dress/ swt-3284 & boutique shopping/ swt-3272), plum textured cardstock by American Crafts, Cricut machine, Cricut cartridges (Straight from the Nest and George and Basic Shapes), clear mini stamp by Studio 112 (flower, 60-30905), clear sentiment stamp by TPC Studios (Greetings, ST93416), pigment ink stack by Martha Stewart Crafts (colours used: ocean and dusk blue), Stampendous! embossing powder in translucent pearl, heat tool by The Paper Studio, gemstone by The Paper Studio (rainbow asst., 317693), and stampin' dimensionals.

Sunday, May 27, 2012

If the Crown Fits Card

One of my favorite brands of patterned paper to work with is Basic Grey.  When I read they were having a Diamond Jubilee Challenge, I decided to play along.  My cats are treated like Queens, so I really wanted to find a digital stamp that featured a cat with a crown.  After a quick image search I found a great digital stamp at www.pjgscrapbookheaven.com called Queen for a Day by Jamie Kay.  The digital stamp was the starting point for my design inspiration.  My style isn't frilly so I took a bling approach to this card.  The Basic Grey patterned paper is from the out of print collection and the circles in this pattern gave me the idea for the cut out circles in this design.

If the Crown Fits Card Supplies:  Pink cardstock, white cardstock, patterned paper by Basic Grey (out of print collection, publication/ m-out-3324 and olivia collection, amelia/ m-via-2642), glitter cardstock by Recollections (179532), patterned paper by My Minds Eye (Lost & Found Two by Jen Allyson, LF2065), Fiskars edge punch, Bling on a Roll adhesive rhinestones by Recollections (174752), Cricut machine, Cricut cartridge (George and Basic Shapes, for 2" circles), computer, printer, digital stamp by Jamie Kay, corner punch by Creative Memories, 1.25" scallop circle punch by Marvy, ink stack by Martha Stewart Crafts (sea lavendar), and rhinestones for crown by Recollections. 

Saturday, May 26, 2012

Friendship Card

Last night I decided to give the ColourQ challenge a second look.  The colour palette was intriguing so I ended up making a second card.  The Friendship Card used the Language of Friendship stamp set by Stampin' Up!

Friendship Card Supplies: White cardstock, pool party and crumb cake cardstock by Stampin' Up!, patterned paper by Crate Paper (Portrait Collection, #PT908), patterned paper by My Mind's Eye (Lost & Found Two by Jen Allyson, #LF2065), Cuttlebug swiss dots embossing folder (37-1604), Texture Boutique by Sizzix, deep double edge punch by Martha Stewart Crafts (Vine Trim, 42-70018),  Boho  Blossoms  punch  by Stampin' Up!      (119858), real estate sign punch by EK Success (54-30033), Language of Friendship stamp set by Stampin' Up! (122752), classic stampin' pad in crumb cake, scrap ribbon for bow (source unknown), and Jolee's rhinestones.

Friday, May 25, 2012

Baseball Father's Day Card

It's Memorial Day weekend and that means Father's Day is quickly approaching.  When I read CAS-ual Fridays challenge this week is for man related cards I decided now was a good time to make a baseball Father's Day card.  Several months back I purchased designer patterned paper by Karen Foster from my friends store, Sooner Scrapbooks.  The paper made a super baseball Father's Day card!!!

Baseball Father's Day Card Supplies:  Tan cardstock, patterned paper by Karen Foster (Baseball Shuffle #64431, and Baseball Stripes #64432), royal textured cardstock by Core'dinations (GX-SB040-12), rubber stamp by Hero Arts (C4666), ColorBox chalk ink in maroon by Clearsnap, star punch by Creative Memories, dimensional baseball sticker by Paper House (STDM-0009, Baseball), and stampin' dimensionals.


Thursday, May 24, 2012

Butterfly Just Because Card

While searching the internet today I found another card challenge.  Yeah!  This butterfly just because card was made for the Freshly Made Sketches challenge.  I love the simplicity and the versatility of this sketch.  You might have noticed that I used polka dots again, so it also qualifies for The Paper Players challenge.  I used my go to colours of iris, and pool party.

Butterfly Just Because Card Supplies:  Cream cardstock, patterned paper by K & Company (Sweet Nectar designer mat pad, 30-657083), pool party cardstock by Stampin' Up!, Cricut machine, Cricut George & Basic Shapes cartridge, rubber stamp by Hampton Art (Windowpane Monarch, PS0520), rubber sentiment stamp by Studio 18 (Just Because, IG66871) iris chalk ink by Hero Arts, pool party baker's twine by Stampin' Up!, and stampin' dimesnionals.

I used the Cricut machine to cut out the 1.5" polka dot and shadow squares.  It saves some time when it comes to trimming and cuts everything the exact same size. 


Wednesday, May 23, 2012

Count My Blessings Card

This weeks ColourQ challenge stretched my creative abilities.  To participate with this color scheme required a trip to the craft store.  Luckily, I had some pool party and crumb cake cardstock by Stampin' Up! in my stash but the mustard and poppy colors were noticeably absent.   I decided to incorporate a polka dot patterned paper to participate in the paper players challenge this week.  I have to admit I'm a little addicted to card challenges at the moment.  It's so much fun! 

Count My Blessings Card Supplies:  Crumb cake and pool party cardstock by Stampin' Up!, patterned paper from Portrait Collection by Crate Paper (#PT908), patterned paper from Lost & Found Two by Jen Allyson for My Mind's Eye (#LF2065), rubber stamp by Stampabilities (I count you twice, ER1038), real estate punch by EK Success (54-30033), eyelet border punch, blossom punch, mixed bunch stamp set, baker's twine in pool party, classic stampin' pad in pool party and crumb cake, stampin' dimensionals all by Stampin' Up!, and Jolee's rhinestone.

Tuesday, May 22, 2012

Happy Anniversary Card

Recently I purchased the Mocha Morning designer paper by Stampin' Up! and I was looking for a good occasion to utilize it in a card.  I decided it would make a perfect anniversary card.  This Happy Anniversary Card was made with two challenges in mind.  The damask and brocade challenge from Moxie Fab World and Mojo Monday challenge with sketch MOJO242.

Happy Anniversary Card Supplies:  Recollections pearlized gold folded cards, mocha morning patterned paper by Stampin' Up!, neutral collection cardstock by Stampin' Up!, eyelet border punch by Stampin' Up!, ribbon by The Paper Studio, Cricut machine, Cricut cartridge (Samping, damask image), Xyron create-a-sticker, computer and printer for sentiment, 1.25" scallop punch by Marvy, circle embellishment from Portrait Collection Pack by Crate Paper, and antique brass brad.

Thanks for stopping by and enjoy the rest of your day!

Monday, May 21, 2012

Sunny Days Ahead Card

I love it when a stamp and random paper from my stash go well together.  The sunny days ahead card was created for the Mojo Monday challenge.  When I saw the design I immediately knew what stamp I wanted to use.  When it came to selecting the paper I was stumped.  Finally, at the bottom of my stash was the perfect patterned paper by Basic Grey (Sweet Threads, lacy organic/swt-3275).  The flowers on the paper are similar to the ones in the stamp.  I used Copic markers to color in the stamped design and used a blender pen to give the flowers a distressed look. 

Sunny Days Ahead Card Supplies:  Pink cardstock, patterned paper by Basic Grey, cream cardstock, pearl aqua cardstock, lucky limeade cardstock by Stampin' Up!, Fiskars upper crest edge punch, adhesive lace die-cut border by Martha Stewart Crafts, rubber stamp by Inkadinkado (Sunny Days Ahead, 60-00117), lucky limeade classic stampin' pad by Stampin' Up!, Copic markers (colorless blender, B02, E00, RV19, R83 and RV34), paper flowers by The Paper Studio (item #285833), butterfly punch by Martha Stewart Crafts, Offray ribbon (#388241), rhinestones by Recollections, and dimensionals.

Sunday, May 20, 2012

Quick & Easy Graduation Card

If your looking for ideas for a handmade graduation card this design might help.  This quick & easy graduation card design is very simple and if you omit the embossing on this card and just stamp the graduation cap image you wouldn't need any special tools.

Quick & Easy Graduation Card Supplies:  White cardstock, congratulations patterned paper by The Paper Studio (item #779249), silver cardstock, VersaMark watermark stamp pad, graduation cap rubber stamp by Stampabilities (item #D1176), Zing! black embossing powder, embossing heat tool by The Paper Studio, ColorBox chalk ink pad in charcoal, black and clear rhinestones, and foam tape.

All supplies for this card were purchased from Hobby Lobby.

Doilies Just Because Card

It's challenge time again.  I have found I like making cards for challenges, it gives me a direction to focus on.  The Doilies Just Because Card was made with two challenges in mind.  CAS-ual Fridays challenge is to use punches or dies, making this card I used three different punches and my Cricut machine.  The second challenge comes from Moxie Fab World doilies & lace challenge.  I love the colors in this card and the sentiment "Just Because" can be used for many occasions.

Doilies Just Because Card Directions:
  1. Make card from tan cardstock.  Finished Size: 4.5" x 6.25".
  2. Trim patterned paper (Doilies, Restoration Collection by Crate Paper), ink edges, and adhere.
  3. Punch plum cardstock (American Crafts) and tan cardstock with Fiskars Upper Crest edge punch, layer, and adhere.
  4. Punch lucky limeade cardstock (Stampin' Up!) with Stampin' Up! lace ribbon border punch, and adhere.
  5. Punch plum cardstock with EK Success real estate sign punch, punch or cut 2" oval with Cricut machine, stamp sentiment with lucky limeade classic stampin' pad, and layer.
  6. Use X-acto knife and cut a small slit by patterned paper, place ribbon through slit and wrap around card, tie bow, and attach sentiment with dimensionals. 

Friday, May 18, 2012

Happy Birthday Polka Dot Card

Happy Birthday to me!!!  Yes, today is my birthday.  So I thought I would share one of the cards from my stash.  I came up with the Happy Birthday Polka Dot card design for one of my customers who requested a black and white color scheme.  The design is savvy, simple, and easy to duplicate.

Happy Birthday Polka Dot Card Directions: 
  1. Make card from cardstock or use ready made card.  Finished size: 4.5" x 6.25".
  2. Trim polka dot chipboard (Recollections), pearl white cardstock, and adhere.
  3. Adhere black glitter tape (Recollections).
  4. Stamp cake image (Hampton Art, PS0518 Sparkling Birthday Cake) and sentiment (TPC Studios, Greetings ST93416), with VersaMark watermark stamp pad, apply embossing powder (Zing! Black glitter finish, 27148), and heat emboss.
  5. Layer embossed image with black cardstock, accent cake image with Gelly Roll pen in clear star, adhere with dimensionals and add rhinestones.

Thursday, May 17, 2012

Zebra Just a Note Card

I love Zebras and zebra patterned paper, fabric, etc.  The Zebra Just a Note Card was made for this weeks ColourQ challenge.  The colors in the challenge happen to include three of my favorite colors so I knew I had to play along.  With this card I took the less is more approach.  The zebra paper deserves all the attention.

Zebra Just a Note Card supplies:  Gray cardstock by The Paper Studio, white cardstock, wisteria wonder cardstock by Stampin' Up!, lucky limeade cardstock by Stampin' Up!, patterned paper by The Paper Studio (Zebra - Turquoise/White, #452086), eyelet border punch by Stampin' Up!, lucky limeade baker's twine by Stampin' Up!, clear stamp by TPC Studios (Greetings ST93416), lucky limeade classic stampin' pad by Stampin' Up!, and stampin' dimensionals.


Wednesday, May 16, 2012

Dare to Dream Card

Well, when I started creating a card this afternoon for the Moxie Fab World Tuesday Trigger Challenge this is not at all what I pictured.  The bright bites photo supplied for the challenge gave me the color scheme to work with.  The bright cookies put circles in my mind.  I searched through my stash and found the perfect patterned paper to work with.  Then I laid out coordinating cardstock colors and the card just evolved one idea after another.  This is how some of my favorite cards are created.

Dare to Dream Card supplies:  White cardstock, lucky limemade cardstock by Stampin' Up!, patterned paper by The Paper Studio (Watercolor Bubble Stripe, #230011), scrap yellow patterned paper, orange glitter cardstock by Core'dinations, pink cardstock, Fiskars multiple circles decorative corner punch, Studio g rubber stamp, lucky limeade classic stamp pad by Stampin' Up!, and dimensionals.

Bright Bite Trigger Challenge Photo

Tuesday, May 15, 2012

Bird Sympathy Card


The bird sympathy card was carefully made with two challenges in mind.  The first challenge is from CAS-ual Fridays and the challenge was to incorporate a bird into the design.  That was easy because I love birds and recently bought the Stampin' Up! bird builder punch and Language of Friendship stamp set.  The second challenge is from Moxie Fab World and their challenge calls for the use of gingham.  The design I came up with isn't fancy or frilly.  I was going for a sweet and heartfelt look, because unfortunately, I have reached the point in my life where sending sympathy cards has become a regular occurrence.

Bird Sympathy Card Directions:
  1. Make card from cardstock or use ready made card.  Finished size: 4" x 5.5".
  2. Trim gingham paper, ink edges, wrap and secure twine, and adhere.
  3. Trim cardstock strip, rough edges with scissors, ink edges, stamp sentiment, and set aside.
  4. Trim kraft paper (I used a kraft shopping sack, recycling at it's best) with Fiskars paper edgers deckle scissors, stamp and punch bird pieces, run pieces through a Xyron create-a-sticker, adhere to kraft paper, and adhere to prepared cardstock strip. 
  5. Slide cardstock strip behind twine and adhere; tie bow.


Monday, May 14, 2012

Brocade and Butterfly Card

The card I made today was created with two challenges in mind.  I used the sketch from the Mojo Monday challenge and I used brocade patterned paper for the Moxie Fab World damask and brocade challenge.  This was a fun card to make and I love the green and pink together.


Sunday, May 13, 2012

Damask Halloween Card

Is it too early for Halloween?  Well, I hope not because I entered this damask Halloween card in the Moxie Fab World damask and brocade challenge.  I love the Haunted Hallows Damask paper by Teresa Collins it's wickedly fun! 


Damask Halloween Card supplies used:  Black  cardstock, patterned paper by Teresa Collins (Haunted Hallows Damask, HH2608), patterned paper by Echo Park (Black Diamonds, BM9009), orange glitter cardstock by Core'dinations (GX-CT240-12), black dotted swiss cardstock by Bazzill Basics, white cardstock, Fiskars paper edgers deckle scissors, ColorBox chalk ink in Blackbird, clear and rubber stamps by Inkadinkado (Happy Halloween sentiment 99477, and cat 95801), Cricut machine for oval shapes, and dimensionals.  

Splatter Challenge Card

It seems I've caught the challenge bug!  The card featured today was made specifically for the Moxie Fab World splatter challenge.  I have to admit before this challenge I've only used my glimmer mist a couple of times.  But now that I've found some inspiration the possibilities are endless!!!

Splatter Challenge Card Directions:
  1. Make card from cardstock or use ready made card.  Finished size: 4.5" x 6.25".
  2. Trim pink cardstock and use Fiskars edge punch on one end, trim white cardstock slightly smaller and emboss using an embossing folder and Texture Boutique machine.
  3. Spray embossed cardstock with glimmer mist and let dry, wrap and secure ribbon, layer with pink cardstock, and adhere.
  4. Stamp and heat emboss floral image (Stampendous! rubber stamp, M217 Dandie Trio and Recollections embossing powder in Glacier), corner punch, ink edges, trim silver cardstock, corner punch, layer, and adhere.
  5. Punch 1.5" circle, stamp sentiment (Stampabilities rubber stamp, D1200 Thank You Circle Seal), punch 2" scallop design, layer, and adhere with dimensionals.

Saturday, May 12, 2012

Mother's Day Gingham Floral Card

Well, I thought I was done with Mother's Day cards until my husband requested I make another.  Today I read about the Moxie Fab World Gingham Challenge and I decided to incorporate gingham into my husband's Mother's Day card request so I could participate.  When I started looking through my paper stash I didn't have a lot of gingham to choose from.  Given what I had to work with I'm really happy with the way this card turned out.  If you want to check out other cards entered in the Moxie Fab World Gingham Challenge just click on the link.  Who knows maybe you will decide to enter the challenge.  Have a creative day!

Mother's Day Gingham Floral Card Directions:
  1. Make card from cardstock or use ready made card.  Finished size: 4.75" x 6.5".
  2. Trim purple cardstock, corner punch all edges (Fiskars decorative corner punch, Three Petals #01-005488), and adhere.
  3. Trim patterned paper, measure and mark corners, punch with a 1" circle punch, and adhere.
  4. Stamp sentiment on white cardstock, round corners with corner punch, wrap and secure  twine, corner punch and ink edges of gingham paper, layer, and adhere.
  5. Cut leaves with Cricut machine, adhere leaves, punch flower layers, adhere layered flower with dimensionals and adhere rhinestone.

Friday, May 11, 2012

Handmade Good Job Cards

Many kids will soon be on summer break.  That means their parents will receive their final report cards for the school year.  If your daughter or son did a good job let them know you're proud of them with  handmade good job cards.  Kids need encouragement and this is a great way to let them know you acknowledge their accomplishments.

For this card pick two coordinating patterned papers with stars, confetti, or something fun your child likes and follow the good job card directions.

Handmade Good Job Card Directions:
  1. Make card from cardstock or use ready made card.
  2. Trim patterned paper and adhere.
  3. Adhere Recollections glitter tape strip, (you can buy this a Michaels).
  4. Stamp sentiment (Good Job stamp from the Stampology collection by Autumn Leaves), use corner rounder punch, ink edges, layer, and adhere.
  5. Adhere rhinestone. 

Thursday, May 10, 2012

Handmade Graduation Card

It's getting close to graduation time and I realized I needed to make a couple of cards.  The handmade graduation card featured was super simple to make.  The patterned paper was a little busy so I kept the lines simple and made the embossed sentiment the focal point.

Supplies used: Black cardstock, patterned paper by The Paper Studio (Black & Cream Diamonds, #864899 & Graduation Icons, #169961), gemstone cardstock by Core'dinations (Jasper, GX-GEM570) cream cardstock, clear stamp by Autumn Leaves (Congrats Graduate by Tia Bennett), gold metallic pigment ink by K & Company (137295), Pearlustre pearl white embossing powder by Stampendous!, heat tool by The Paper Studio, dimensionals by Stampin' Up!, and Recollections rhinestone.

Finished size: 5" x 7" 

Tuesday, May 8, 2012

Mother's Day Butterfly Card

If you're still looking for inspiration for a handmade Mother's Day card here's one more example.  The layout design for the Mother's Day Butterfly card is pretty simple.  I heat embossed the butterfly stamped image but if you don't have the tools or supplies for that a stamped image works just fine.  If you can't find the perfect stamp you can always use a butterfly dimensional sticker.  Get creative and have fun, your mom will love it!

Supplies used: Recollections black folded card, The Paper Studio patterned paper (Moire Fleur-Floral, item #465005), Recollections patterned paper (Black Small Dots), white cardstock, Core'dinations gemstone cardstock (Rose Quartz, GX-GEM380),  Inkadinkado butterfly rubber stamp  (60-00048), Hero Arts Mother's Day sentiment stamp (C2962), VersaMark watermark stamp pad, Recollections embossing powder in Party Pink, Hero Arts chalk ink in Grass, Offray ribbon, and Recollections rhinestones.

Mother's Day Butterfly Card Directions:
  1. Make card from cardstock or use ready made card.  Finished size: 4.5" x 6.25".
  2. Trim patterned paper, ink edges, and adhere.
  3. Trim polka dot paper strip, ink edges, layer with gemstone cardstock, cut a strip of ribbon and adhere to paper strip, cut a 8" piece of ribbon and tie bow at center of attached ribbon, trim ribbon as needed, and adhere to card. 
  4. Stamp butterfly with VersaMark stamp pad, heat emboss, stamp sentiment, ink edges, and adhere.
  5. Adhere rhinestones.

Monday, May 7, 2012

Mother's Day Handmade Card

Here is one last Mother's Day Handmade card idea for this year.  In case you've missed my other examples here are links to them:
Don't wait!  Get inspired to make a Mother's Day handmade card.

Supplies used: White cardstock, Island Indigo cardstock by Stampin' Up!, Sizzix Texture Boutique, Cuttlebug embossing folder (Perfectly Paisley, 37-1619), Martha Stewart Crafts ink stack (colors used: blue dusk, and stem green), ColorBox pigment stamp pad in Ocean (15201), Inkadinkado paisley rubber stamp (95784), Hero Arts Mother's Day rubber stamp (C2962), classic stampin' pad in Lucky Limeade by Stampin' Up! (122935), Stickles in Crystal by Ranger, Blossom punch by Stampin' Up! (125603), Offray ribbon (sku # 388241), small scissors, and stampin' dimensionals (104430).

Mother's Day Handmade Card Directions:
  1. Make card with cardstock or use ready made card.  Finished size: 4" x 5.5".
  2. Trim island indigo cardstock slightly smaller than card.  Trim white cardstock slightly smaller and emboss using Sizzix Texture Boutique.
  3. Use ink stack and ocean pigment ink to accent raised parts of embossed cardstock.  Wrap with Offray ribbon, layer, and adhere to card. 
  4. Stamp paisley image with Lucky Limeade, cut out paisley image, and accent with crystal Stickles, let dry or use heat tool to accelerate dry time.
  5. Stamp sentiment, layer, and adhere.
  6. Punch blossom, accent with ink, adhere, and adhere paisley cut out with dimesionals.

Saturday, May 5, 2012

Happy 60th Birthday Handmade Card

May is full of birthdays in my family.  This year my dad is celebrating a milestone birthday of 60 years.  Here is the Happy 60th Birthday handmade card I made him.  The colors and design coordinate with the theme for his "surprise" party. 

Supplies used:  Recollections ready made card, patterned paper by Recollections (Black Equilibrium), yellow cardstock, blue cardstock, white glitter cardstock, ColorBox chalk ink in Blackbird, Cricut machine, Cricut cartridges (George and Basic Shapes and Stamping), Xyron create-a-sticker, Fiskars paper edger deckle scissors, Bubble•A•Bilities primary stars stickers by The Paper Studio (501379), and Martha Stewart Crafts fine glitter in Sugar Cube.

Happy 60th Birthday Handmade Card Directions:
  1. Trim patterned paper, ink edges, and adhere to card.
  2. Cut sentiment and numbers with Cricut machine and run sentiment through a Xyron create-a-sticker.
  3. Cut yellow cardstock with deckle scissors, adhere sentiment and numbers, and adhere to card.
  4. Sprinkle sentiment and numbers with glitter and shake off excess (sometimes I use a foam art brush to remove more glitter if needed).
  5. Adhere star stickers.


Thursday, May 3, 2012

You Rock Zebra Card

Okay, let me say I love this card.  I made the You Rock Zebra card for my youngest niece.  She is turning eight.  The inside is stamped with a happy birthday sentiment.  I knew I wanted to use the guitar and you rock stamp, then I used her favorite colors and tried to make it look as young and hip as possible. 

Supplies used: Recollections black folded card, Recollections B&W Zebra glitter chipboard paper, Recollections Lime Green glitter cardstock, white cardstock, aqua net ribbon by Creative Impressions (I buy this by the yard at Sooner Scrapbooks), Inkadinkado clear stamps (98693 Rock Star), VersaMark watermark stamp pad, Zing! Black glitter finish embossing powder, Zing! Neon Pink florescent embossing powder, embossing heat tool by The Paper Studio, Copic markers in Robin's Egg Blue (B02) & Yellowish Green (YG06), Fiskars paper edger deckle scissors, Spare Parts gemstone brads (D71-CLR), and Stampin' Up! dimensionals (104430).

You Rock Zebra Card Directions:
  1. Trim zebra chipboard and attach ribbon. Set aside.
  2. Stamp and heat emboss guitar, color with markers, and layer with lime green cardstock.
  3. Measure and punch holes for gemstone brads, use a powerful adhesive, attach image layer to zebra layer with brads.
  4. Adhere design to ready made card, finished size: 4.5" x 6.25".
  5. Stamp and heat emboss You Rock sentiment, trim with paper edging scissors, layer, and adhere with dimensionals or foam tape.

Tuesday, May 1, 2012

Heat Embossed Butterfly Card

Continuing with a butterfly theme this heat embossed butterfly card is perfect for many occasions.  I love the butterfly stamp by Inkadinkado.  The monochromatic color scheme creates a soothing look for this card design.

Supplies used: White cardstock, blue cardstock, Bazzill Basics dotted swiss cardstock in Nightwater, patterned paper by K & Company (Julianne designer mat pad, 30-657113), Fiskars edge punch,   Inkadinkado butterfly trail stamp (99257), ColorBox pigment stamp pad in Cape Cod, Stampendous Pearlustre embossing powder in Lapis and Translucent Pearl, Zing! embossing powder in Blue metallic finish, heat tool by The Paper Studio, Hero Arts clear sentiment stamp (classic messages, CL414), ColorBox Cat's Eye archival dye ink in Atlantic Blue, Stampin' Up! dimensionals, and Recollections rhinestones.

Heat Embossed Butterfly Card Directions:
  1. Make card from cardstock or use ready made card.  Finished size: 4" x 5.5".
  2. Trim patterned paper, ink edges, and adhere.
  3. Edge punch Bazzill Basics cardstock and adhere.
  4. Stamp image with pigment ink, tilt image and apply embossing powder.  Apply lapis powder to the butterfly and a little bit of the trail image, tap off excess.  Apply blue Zing! powder to middle portion of trail, tap off excess.  Apply translucent powder to bottom portion of trail, tap off excess, and heat.
  5. Layer embossed image and adhere.
  6. Stamp sentiment, layer, and adhere.
  7. Adhere rhinestones.
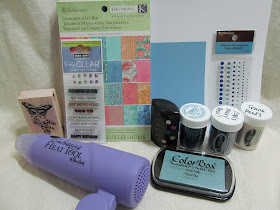
Not pictured: Fiskars edge punch, Bazzil Basics cardstock, and Stampin' Up! dimensionals.